Well with the deluge of issues installing the
planes I am going to make this pictorial tutorial how the files should be
located.
As an example we'll have the Beaufighter TFX (Be sure that you expand the pictures to be readable)
- Save the BeauTFX.rar (or .zip) into a temporary folder. For example
MyDocuments\SFP1
- Extract the files into the temp folder, use the following methods
· Double click on the file and click on the Extract to icon, use the default name
· Right click on the mouse and select extract to Beau-TFX
- You now should have something like this:
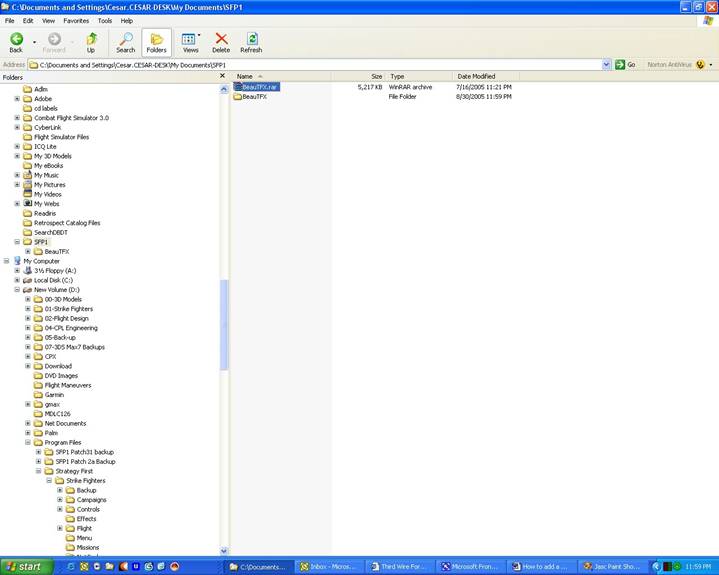
You can delete the BeauTFX.rar file since it is no longer needed
- Now Move the BeauTFX to your SFP1 folder. In this example I have the folder in the D drive, so it looks like this
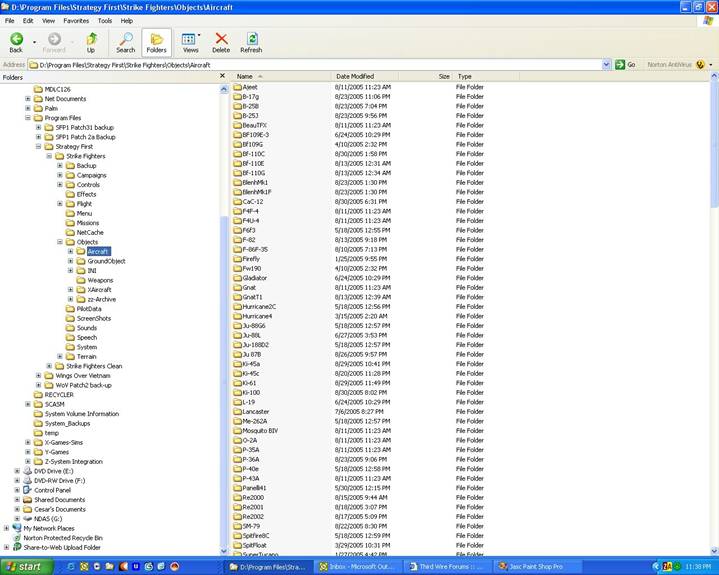
Note that the BeauTFX folder is located at
D:\Program Files\Strategy First\Strike Fighters\Objects\Aircraft
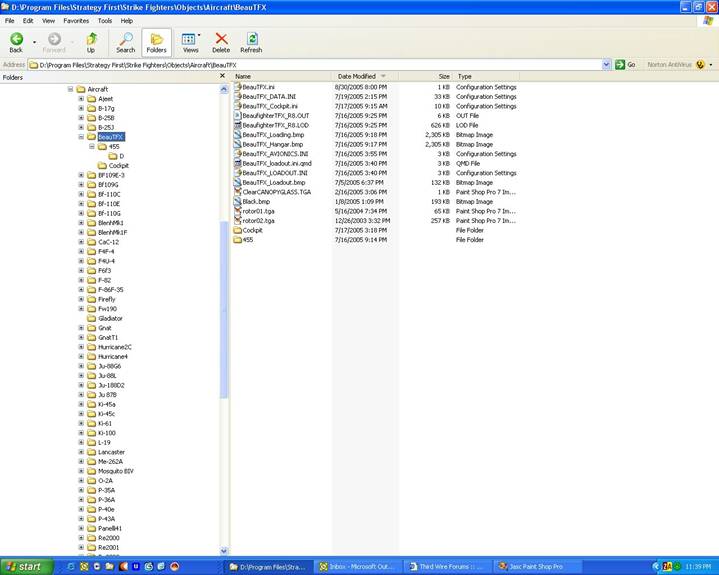
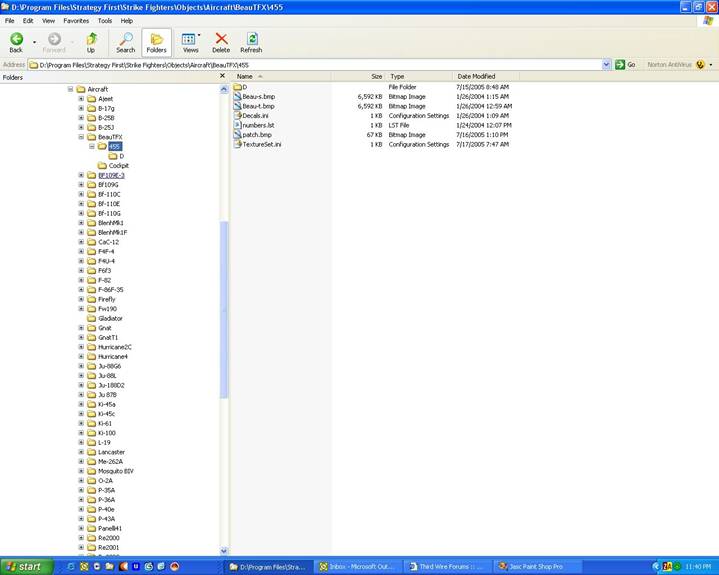
- This is how the BeauTFX folder should look like.
Note that there are several files, the key file is the BeauTFX.ini. The file name must match the folder name.
All other files are specified inside the BeauTFX.ini file, as a standard practice all other files start with the folder name.
Required Files:
BeauTFX.ini is the initialization file. It specified the display name of the model, the name of data, avionics, cockpit, screen files. It also specifies the name of the model LOD and the textures.
The BeauTFX_data.ini file is the heart of the model, it specifies the FM characteristics, collision points, damage boxes, animation, etc.
The BeaufighterTFX_R8.LOD is the binary files created by the 3DS Max Third Wire Exporter and it is the game model.
The BeauTFX_Loaout.ini is a text file with the standard weapons Loadout for the plane depending on the mission type/
The BeauTFX_Loadout.bmp is a small picture that shows the plane from the front and where the weapon stations are located. Format is BMP 150x75 24bits.
Optional files:
The BeauTFX_Cockpit.ini is only required for custom cockpits. You can use one of the game’s stock cockpits by using the proper declaration in the BeauTFX.ini file
The BeauTFX_Avionics.ini is a text file with custom avionics. You can use one of the game’s stock avionics by using the proper declaration in the BeauTFX.ini file, usually to match a stock cockpit or leave it blank if not needed
The BeaufighterTFX_R8.OUT is a text file created by the 3DS Max Third Wire Exporter and is usable for decal placement since it shows the mesh names. Not all models have this file
The BeauTFX_Loading.bmp and the BeauTFX_Hangar.bmp are custom screens if you want to have a unique screen during the Loadout selection or during the game loading. If not specified in the BeauTFX.ini file, they default to the stock screens. File format is BMP 1024x768 24 bits
-
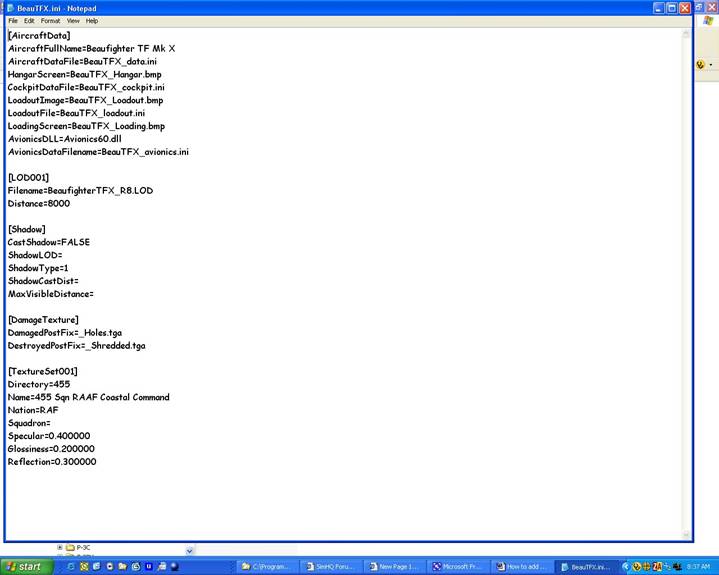
This is how a plane.ini file looks like. Note the declarations for the different files required, the model LOD, if Shadows and Damage models are used.
Also note one texture skin (TextureSet001) That is the default texture, with SP4 new textures are added automatically if the new texture folder uses a standard format. More of it later.
-
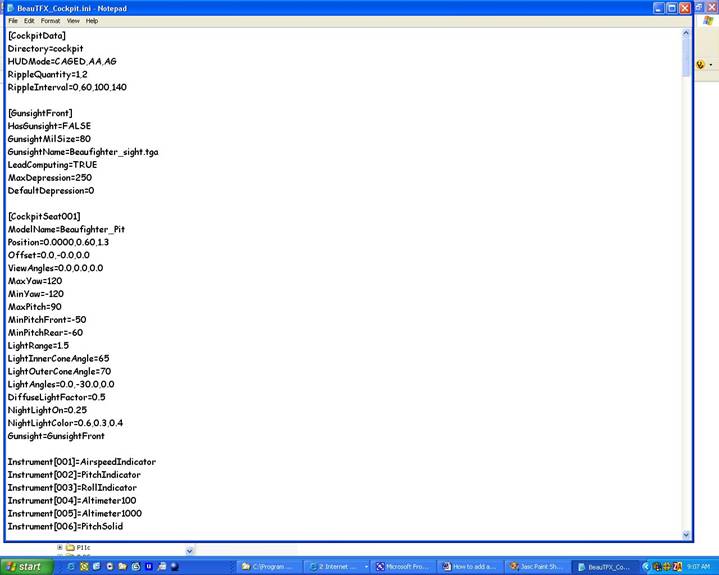
This is how a Plane_Cockpit.ini file looks like. The scope of cockpit making and cockpit ini mods are beyond the scope of this document
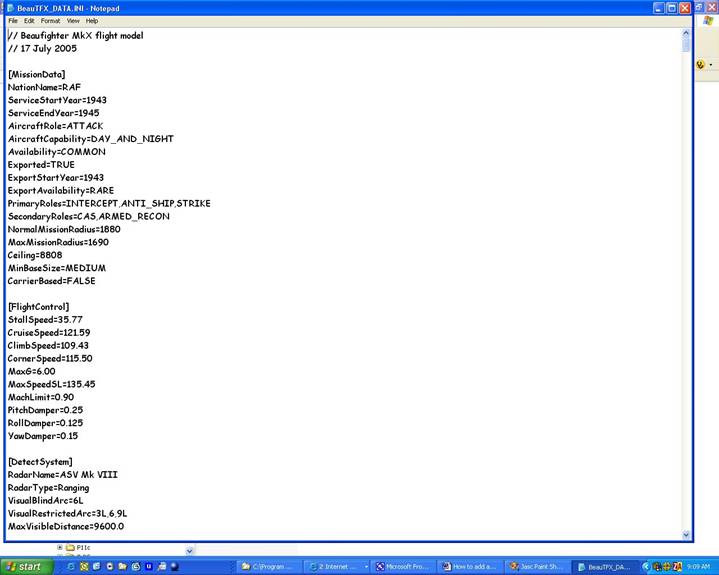
- This is how a Plane_Data.ini file looks like. The scope of cockpit making and cockpit ini mods are beyond the scope of this document
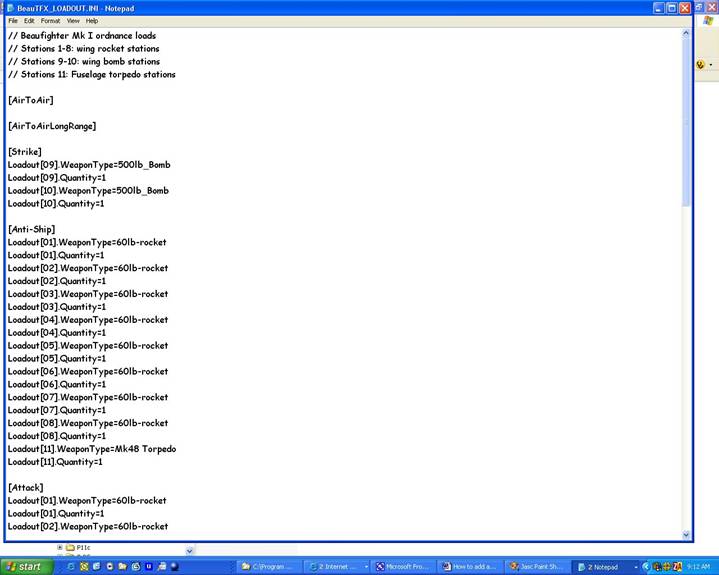
This is the stock Loadout that your plane and the AI planes will have, of course if they match the year, nation, etc.
- This is how a Plane_Loadout.ini file looks like.
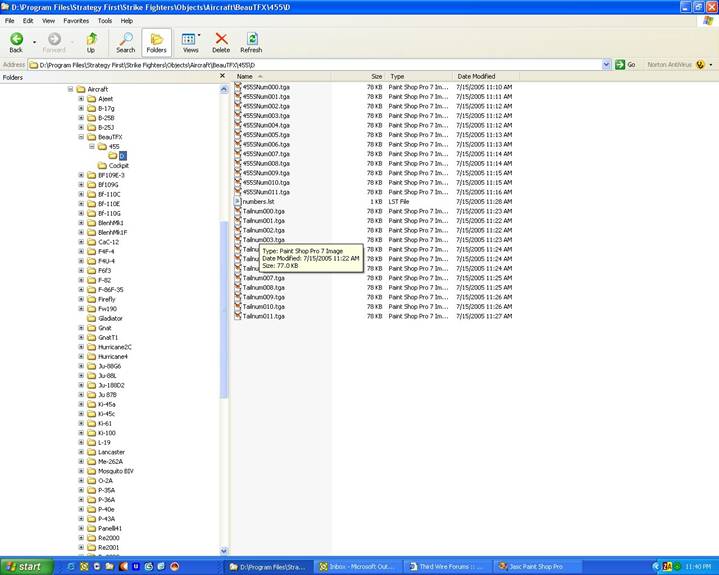
- There is usually one folder for the model texture. It looks like this.
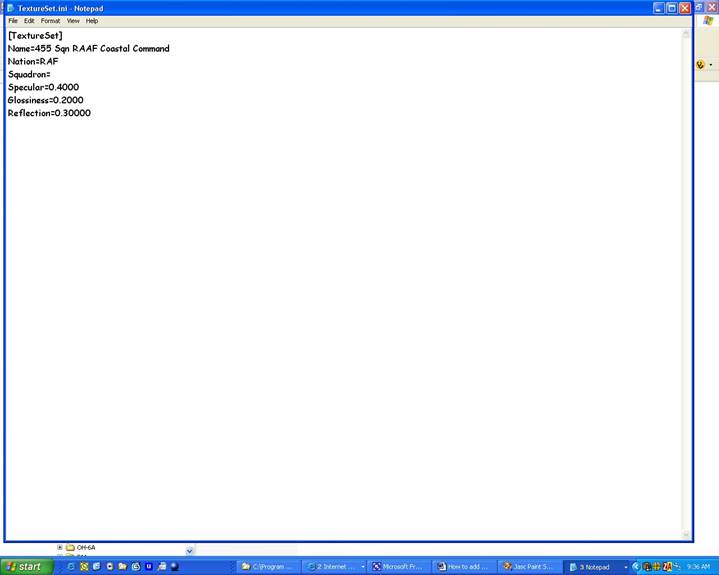
The TextureSet.ini is loaded automatically and added to the BeauTFX.ini file. First come, first serve.
The BMP files are the actual textures files. Minimum is one texture file but they can be several.
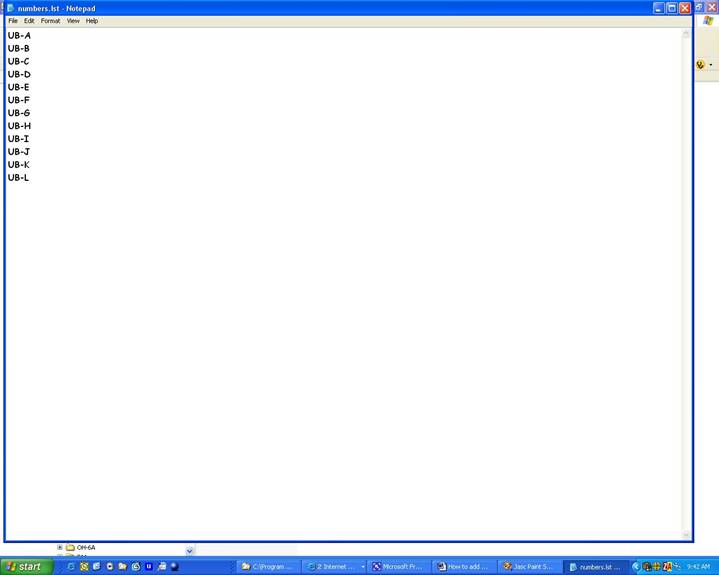
Numbers.lst is a text file with runtime custom display numbers, they will correspond to a decal name.
Patch.bmp is a small bmp file that will display as you select the texture in the game Loadout screen, Format is BMP 150x150 24 bits.
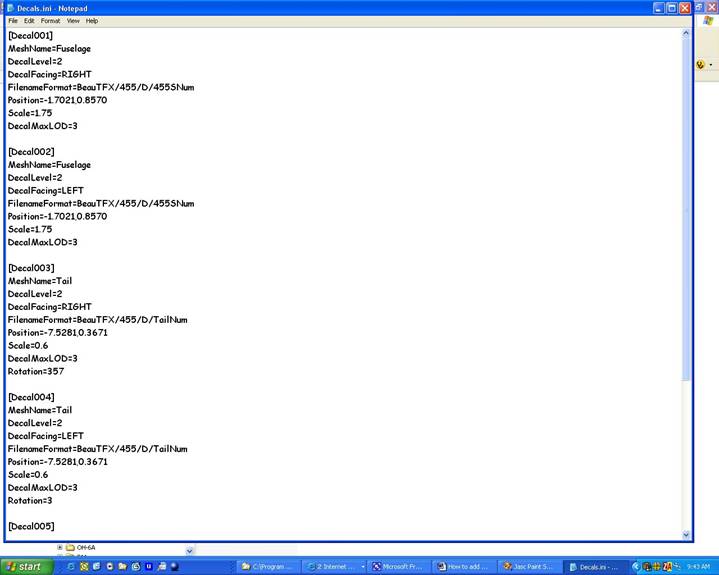
You can have a Decals.ini file to declare the decals to be added at runtime
The Decals.ini file points to the location of custom decals.
This is how a TextureSet.ini file looks like
This is how a Numbers.lst look like
This is how a Decal.ini looks like
- If you have a custom decal folder, it will look like this:
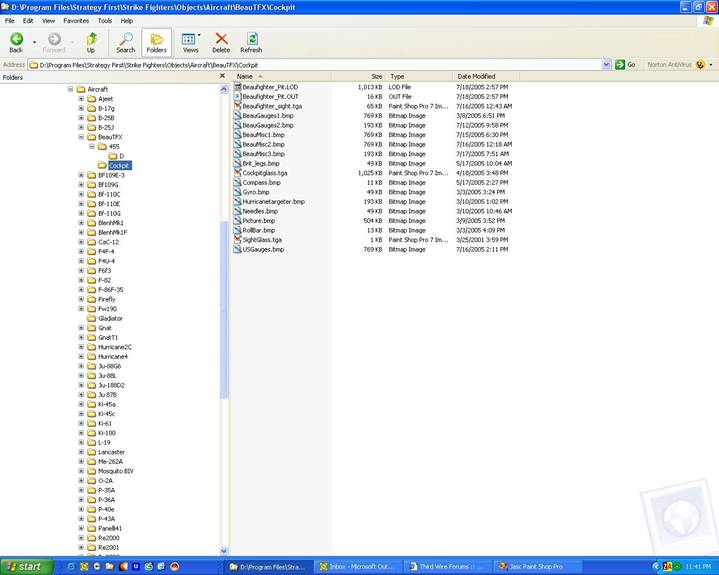
- To make the plane flyable you need to have a cockpit folder. You can use either the game’s stock cockpits or a custom cockpit.
In this case there is a custom cockpit and here are the contents of the folder.
Have fun !!!